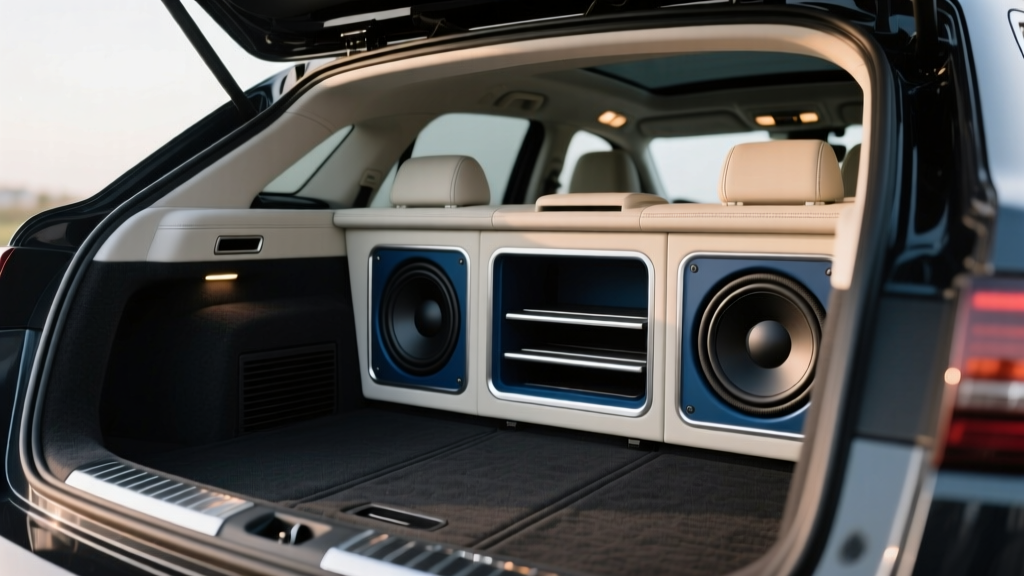
Sub Box Enclosure Customization: Pro Tips (2026)
A subwoofer can transform a car?s sound system, but the enclosure is what decides whether that bass feels tight and musical or boomy and sloppy. Plenty of enthusiasts spend money on a better sub, a stronger amp, and thicker power wire?then bolt the sub into a generic box and wonder why it doesn?t sound ?right.? The enclosure is the subwoofer?s home, and like any home, the layout and materials matter.
Advanced sub box customization is about controlling how the woofer interacts with the air inside the box and the air in your cabin. When you customize the enclosure for your vehicle, your sub, and your listening goals, you can gain output (louder), extension (deeper), accuracy (cleaner), or all three?without changing your equipment.
This guide walks through proven enclosure techniques used by builders, competitors, and detail-obsessed daily drivers. You?ll get step-by-step methods, practical tuning advice, real-world examples, and the common mistakes that ruin otherwise great builds.
Start With a Plan: Vehicle, Subwoofer, and Goals
Before you cut wood or order fiberglass, get specific about what you want the system to do. ?More bass? is vague. ?Hard-hitting kick drum with clean low-end for hip-hop at moderate volume? is actionable.
Define Your Target Sound
- Sound quality (SQ): tight, accurate bass; tends to favor sealed or low-tuned ported designs
- Daily driver SPL: strong output with good musicality; commonly a ported enclosure tuned around 30?35 Hz
- Competition SPL: maximum output at specific frequencies; often higher tuning and specialized loading
- Space-first stealth build: custom-fit enclosures (spare tire well, side panels) with efficient subs
Collect the Key Specs
For most custom work, you need:
- Subwoofer parameters: recommended sealed/ported volume, port area and tuning suggestions, mounting depth, cutout diameter
- Available space: maximum external dimensions, hatch/trunk layout, seat clearance, access to spare tire
- Electrical and power: real amp power (RMS), vehicle voltage stability, intended listening level
Advanced Enclosure Design Options (and When to Use Them)
Sealed vs. Ported: Advanced Tweaks
Sealed boxes are easier to build and tune, and they handle musical variety well. Customization focuses on rigidity, damping, and volume precision.
Ported boxes can deliver more output and deeper extension, but they?re more sensitive to errors in volume, port dimensions, and air leaks. Advanced customization includes port shape optimization, tuning strategies, and controlling port noise.
Bandpass, 4th/6th Order (for Experienced Builders)
Bandpass enclosures can be extremely loud and efficient, but they?re less forgiving and usually less flexible across different music styles. Consider a bandpass build if you:
- have a dedicated goal frequency range (for example: heavy 30?55 Hz emphasis)
- are comfortable modeling and building to tight tolerances
- can sacrifice space and simplicity for output
Custom-Fit ?Molded? Enclosures
Fiberglass or composite enclosures let you reclaim space by molding into factory contours (spare tire well, trunk corners, under-deck areas). They?re ideal for:
- sedans with limited trunk depth
- hatchbacks where you want cargo space
- show builds where fit and finish matter
Step-by-Step: Modeling and Prototyping Before You Build
Step 1: Measure Available Space Accurately
- Remove trunk liners and panels where the enclosure will sit.
- Measure width, height, and depth at multiple points (cars aren?t square).
- Account for trunk hinges, seat latches, and movement of panels.
- Plan service access (spare tire, battery, factory amp, etc.).
Step 2: Calculate Net Volume (Not Just Box Size)
Net volume is what the sub ?sees? after subtracting:
- subwoofer displacement
- port displacement (ported boxes)
- bracing displacement
- any internal amp racks or inserts
Practical tip: Many builds miss the target by 10?20% because they only calculate the outer dimensions. That?s enough to change tuning and sound.
Step 3: Choose a Tuning Strategy (Ported)
General daily-driver tuning guidelines:
- 28?32 Hz: deeper extension, smoother low bass, less ?peak? output
- 32?36 Hz: punchier and louder for mixed music, common for SUVs/hatches
- 36?40 Hz: very punchy, more output in upper bass, can sound boomy if not controlled
Real-world example: A 12" sub in a hatchback with cabin gain may feel strong at 30?32 Hz, while the same setup in a sealed sedan trunk might benefit from 33?35 Hz to keep it lively through the rear seat pass-through.
Port Customization: Getting Loud Without Port Noise
Port Area, Shape, and Air Speed
Advanced port design is mostly about controlling air velocity. Too little port area causes ?chuffing? (port noise), compression, and inconsistent bass at higher volume.
- Slot ports: easy to build into MDF boxes; great for rectangular designs and strong output
- Aero ports (round): often quieter at high velocity when properly flared
- Flared ends: reduce turbulence and noise
Practical tip: If you hear wind noise on heavy bass notes, don?t assume the sub is bottoming out?inspect the port design and internal air leaks first.
Step-by-Step: Building a Cleaner Slot Port
- Plan for adequate port area: if you?re pushing higher power, prioritize larger port area.
- Use rounded internal edges: a 3/4" round-over bit on the port entrance dramatically reduces turbulence.
- Keep the port path smooth: avoid sudden turns; if a bend is necessary, use a gradual curve or a wide bend radius.
- Check port clearance: keep at least one port width of clearance between the port exit and the rear wall when possible.
- Seal the port seams: wood glue plus a bead of quality sealant prevents micro-leaks.
Structural Upgrades: Make the Box Inert
Sub boxes don?t just hold a sub?they resist pressure. Flex wastes output and adds distortion.
Bracing Techniques That Actually Work
- Window bracing: large cutouts maintain airflow while stiffening panels
- Dowel bracing: simple and effective for long spans (side-to-side support)
- Double baffle: two layers on the sub mounting face reduce flex and improve mounting strength
Step-by-Step: Adding Window Bracing
- Cut a brace panel that fits inside the box, spanning the largest surfaces.
- Create large ?windows? (rounded rectangles) to keep airflow open.
- Glue the brace with wood glue and clamp or screw while curing.
- Seal all joints after curing for an airtight enclosure.
Material Choices: MDF, Birch, and Composites
- 3/4" MDF: common, affordable, consistent; great for most builds
- Baltic birch plywood: stronger per weight, more durable; excellent for large boxes or vehicles that see vibration and heat
- Fiberglass/composite: best for molded enclosures; requires skill to avoid leaks and weak points
Acoustic Refinements: Damping, Stuffing, and Panel Control
When to Use Polyfill (and When Not To)
Polyfill can make a sealed box behave like it?s slightly larger, smoothing response. It?s not a magic fix for the wrong volume.
- Best use: sealed enclosures that are a bit small
- Use carefully: ported boxes?excess stuffing can interfere with port airflow and change tuning behavior
Internal Lining and Resonance Control
- Line large internal walls with acoustic foam or damping material to reduce standing waves (more relevant on larger enclosures).
- Ensure bracing is solid?damping alone won?t fix a flexible panel.
Vehicle Integration: Positioning, Loading, and Cabin Gain
Where you place the enclosure and which way it faces can change bass more than small tuning adjustments.
Common Orientations (and What They Tend to Do)
- Sub and port facing rear (toward trunk/hatch): often the loudest in hatchbacks and SUVs
- Sub facing up (hatch builds): can smooth response and help protect the cone
- Sub/port facing forward (toward cabin): can improve front-stage integration in some sedans with pass-throughs
Real-world example: In many sedans, a rear-facing ported box can get ?stuck? behind the rear seat, sounding muffled. Folding the seat, using a ski-pass opening, or rotating the port toward the opening can noticeably improve output and clarity.
Seal-Off and Baffle Wall Concepts (Advanced)
Serious builds sometimes isolate the sub in the trunk and ?couple? it to the cabin through a controlled opening. This can improve efficiency and reduce rattles, but it?s fabrication-heavy and vehicle-specific.
Step-by-Step: Leak-Proofing and Testing Your Enclosure
Step 1: Seal Every Seam Correctly
- Use wood glue on all MDF-to-MDF joints (it?s stronger than screws alone).
- After assembly, apply a thin, continuous bead of sealant on internal seams.
- Pay attention to corners, brace joints, and around terminal cups.
Step 2: Perform a Simple Leak Check
- Play a low-frequency test tone at low volume (around 25?40 Hz for most setups).
- Move your hand around seams, terminal, and sub cutout to feel for air movement.
- If you find leaks, reseal from the inside if possible.
Step 3: Confirm Tuning (Ported)
- Use an RTA app with a calibrated mic (or a basic measurement mic) to see where output peaks.
- Listen for port noise and ?one-note? boominess?often a sign of too-high tuning for your cabin or too little port area.
Product Recommendations: Materials and Hardware Worth Buying
Wood and Build Materials
- 3/4" MDF: best value for most rectangular trunk builds
- 13-ply Baltic birch: premium option for stronger, lighter enclosures
- Quality wood glue: choose a reputable carpenter?s glue for strong joints
Terminals and Wiring
- Binding posts vs. terminal cups: binding posts often seal better and handle thicker wire; terminal cups are convenient but can leak if poorly installed.
- OFC speaker wire: reliable and durable; choose gauge based on power and run length (12?16 AWG is common for sub leads inside the vehicle).
Sound Deadening for the Car (Not the Box)
If you?re investing in enclosure customization, budget for basic cabin rattle control:
- butyl-based deadening mats for trunk lid, rear deck, and quarter panels
- closed-cell foam for plastic-on-plastic contact points
- mass-loaded vinyl (MLV) if you?re chasing a quieter cabin (more advanced)
Common Mistakes to Avoid
- Building to ?gross? volume: ignoring displacement changes tuning and response.
- Undersized port area: leads to chuffing and power compression, especially with modern high-excursion subs.
- Relying on screws instead of glue: screws hold parts in place; glue makes the joint strong and airtight.
- No bracing on large panels: flex steals output and creates distortion.
- Forgetting sub clearance: magnet depth, venting, and cone travel need room?especially in shallow trunk builds.
- Ignoring the vehicle?s acoustics: orientation and cabin coupling can make a great enclosure sound mediocre.
- Chasing the wrong tuning: a ?low tune? isn?t always better if your music and cabin don?t support it.
FAQ: Advanced Sub Box Enclosure Customization
What?s the best enclosure type for tight, accurate bass?
A properly sized sealed enclosure is the most consistent path to tight bass across different music. If you want more output while staying controlled, a low-tuned ported box with adequate port area can also be very clean.
How do I know if my port is too small?
Common signs include chuffing/wind noise, bass that gets ?messy? at higher volume, and output that stops increasing even when you turn the amp up (compression). Increasing port area, adding flares, and smoothing port entrances usually fixes it.
Can I make a box sound deeper without rebuilding it?
Sometimes. For sealed boxes, adding polyfill can slightly lower the perceived resonance. For ported boxes, tuning changes typically require port length adjustments?some builders design a removable or adjustable port panel for this reason.
Is fiberglass better than MDF?
Fiberglass isn?t automatically ?better,? but it?s unbeatable for custom-fit shapes and stealth installs. MDF is usually simpler, cheaper, and very solid for traditional rectangular enclosures. Many high-end builds combine both: MDF baffle with a fiberglass molded shell.
Should the subwoofer face the rear or the cabin?
It depends on the vehicle. Hatchbacks and SUVs often get strong results with rear-facing. Sedans sometimes benefit from aiming the port or sub toward a seat pass-through. The best approach is to test orientations if space allows.
Do I need a custom box if I bought a good subwoofer?
If you want the sub to perform like it should, yes. Even a great sub in a poorly sized or leaky enclosure will underperform. A custom enclosure matched to your sub and car is one of the highest-impact upgrades you can do.
Conclusion: Your Next Steps for a Smarter Custom Enclosure
Advanced sub box customization comes down to control: controlling air volume, controlling panel flex, controlling airflow through the port, and controlling how bass loads into your cabin. Start by defining your goal, calculate true net volume, choose a tuning strategy that matches your music and vehicle, then build for stiffness and airtight sealing. After that, refine orientation and rattle control so the bass you paid for actually makes it to the driver?s seat.
Actionable next steps:
- Measure your available space and calculate a realistic net volume target.
- Decide whether you?re optimizing for SQ, daily-driver output, or a stealth install.
- If going ported, prioritize port area and smooth airflow features (round-overs, flares).
- Add bracing and double baffles before you worry about cosmetics.
- Test orientation in your vehicle and deaden the trunk to eliminate rattles.
For more practical car audio and interior upgrade guides, explore the latest articles on carinteriormix.com.